Monday, October 21, 2013
Mosrite Guitar Build: I was very saddened by the news today that Andy Mo...
Mosrite Guitar Build: I was very saddened by the news today that Andy Mo...: I was very saddened by the news today that Andy Moseley had passed away. If you've read this blog you know that the guitar body which w...
I was very saddened by the news today that Andy Moseley had passed away. If you've read this blog you know that the guitar body which was originally built by Semie Moseley was kept by his brother, Andy for just over 20 years with intentions of finishing it. That's when I acquired it last year and managed to complete the guitar with much help from Andy and others. I never got the chance to take the guitar over to Nashville and show it to him. I will think of him and Semie both each time I play it. I'm very grateful for his contribution to making my small dream of owning a Mosrite a reality, it's a special one! Mosrite Forever!
Friday, August 16, 2013
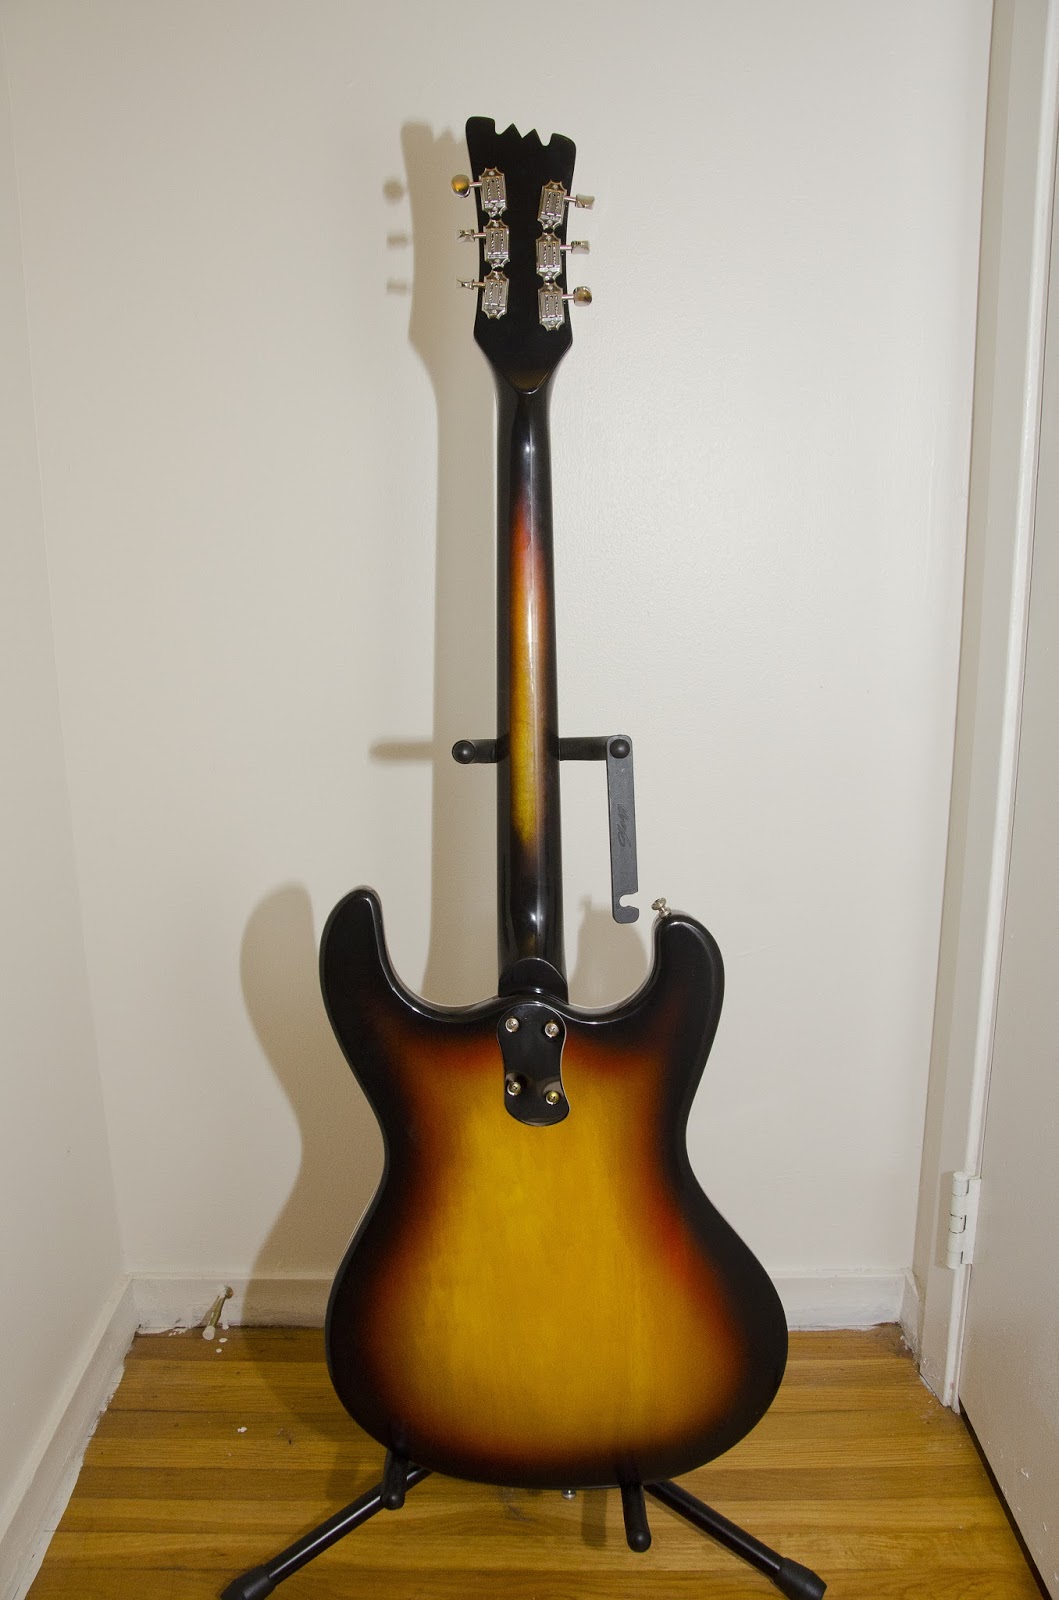
It's FINISHED
Well, once I got rolling on the last few stages of the project, I spent all my time building and not posting. I did, however, take photos of the process. I couldn't be happier with the way the entire guitar turned out. Here's a quick snapshot of the finished guitar. I haven't gotten around to photographing it professionally. I'll be making time for that soon! If you'd like to hear it, check out my video at Mosrite Video


Sunday, June 2, 2013
Now the hard part... waiting... Friday I shipped out the neck to get the "Mosrite" and "The Ventures Model" logos screen printed on the headstock. It was a little difficult to let it go out of my site, but I have full faith that it's in good hands. PLUS, I insured it :). A big thank you to my buddy Brandon who helped me do the wiring and shielding on the pick guard. I could've done it myself, but he did a much nicer, cleaner job than I would have I'm sure (and i'm meticulous). For the tech minded out there, We wired it with switchcraft switch and output jack and a CTS pot on the tone and the new Seymour Duncan high speed, linear-audio taper volume pot, a 600V .047 Orange Drop capacitor, and vintage cloth "pushback" wires. Anyway, I gotta wait for the neck to return then clear coat it with 7 or 8 more coats then wait ANOTHER week to let it cure before wet-sanding and buffing. Good news is that's the light at the end of the tunnel. If all goes well, I'll be playing her in just a couple of weeks!


Sunday, May 26, 2013
Today I spent about 2 hours scraping the plastic binding around the guitar body to get the black paint back off of it. This is a very tedious task but all in all it went well. I had to touch up a couple of spots where i scraped too far and hit the wood edge. Once that dries I'll scrape the binding just a little more to make sure it has a nice even edge and then it's on to 10 coats of clear on the body. The neck is getting shipped out on Tuesday to get the headstock logo screen printed by Bob Shade of Hallmark Guitars! Not much longer and I'll be playing it! Photos are better this time. I shot them with a real camera instead of my phone! Look at that color pop!


Friday, May 24, 2013
Sunburst
Made some serious progress over the last two days! Laid down the sanding sealer and then all three colors of the sunburst! Now it's looking like a real Mosrite! I got a couple of coats of clear on the body and neck as well. Next week the neck is getting shipped out to Bob Shade at Hallmark Guitars where he will use the original silk screens from the Mosrite factory circa 1960's to silkscreen the "Mosrite" and "The Ventures Model" logos on the headstock. When I get it back it will get about 8 more coats of clear then cure for a week and get buffed out. In the meantime, the body will go ahead and get all 10 coats of clear!


Friday, April 12, 2013

Today I got in the Vibramute. I cannot tell you how excited I am to have it. Both the Vibramute and the roller bridge are original, new, old stock pieces from the 1960's. Never installed on a guitar. Now that I got these final pieces in, I can get back to work. Next step is to assemble the guitar, measure and drill the mount holes for the tremolo then I can move on into finishing. Hopefully I'll be able to spend some time on it next week.
Friday, April 5, 2013
Back at it!
The Mosrie has been on hold awaiting both funds and the Vibramute. This week I ordere both the Kluson Deluxe tuners from TonePros as well as the Vibramute. Once the Vibramute arrives, I can assemble the guitar, measure, mark and drill for the bridge and Vibramute placement. Then it's on to the sunburst finish.
Today I made the jig needed to hold the body and neck to the rotisserie style painting support.


Today I made the jig needed to hold the body and neck to the rotisserie style painting support.
Tuesday, February 26, 2013
Still at it
It's been a few weeks since I posted. Not much progress since the last post. I did, however, get the grain filler done and final sanding finished. I hope to get the sanding sealer done this weekend. Then ill be waiting to get my Vibramute and bridge in so I can measure and drill for those. Then it's on to the sunburst finish!
Monday, January 28, 2013
Holed it!
This doesn't appear to be much of a task. After all, it's just 4 holes, right!? Well, considering I only had one shot at doing this right, it's a big deal. Proper alignment of the neck is important. I put the neck in place but even with my small shims in the neck pocket, there was some play. Using a straight edge, I was able to line up the fret markers (white dots on the neck) with the centerline of the body then mark and drill those holes!


Saturday, January 26, 2013


Next step is to do grain filler, and let that dry, sand the entire body again and then we can move on to the next most nerve wracking part... the finish! Going to try my best to duplicate an original sunburst. I've got water based lacquer and some "vintage amber", "orange", and "black" tints for the lacquer to do the busrt with.
Thursday, January 24, 2013
Today I was able to test fit the new binding. I used a heat gun to warm and soften the plastic binding to allow it to bend easier into the tight curves of the guitar body. Once it was all in place i allowed it to cool for a couple of hours then came back and took it back off so that I could glue it. Got it glued in place and re-taped and wrapped with some HUGE rubber bands. When I say huge, I mean they're about 15 inches across BEFORE you stretch them. HA! Anyway, now it's a 2 day wait for the glue to cure fully then I can scrape the plastic binding down where it's larger than the body and do some final sanding of the body in places where it's larger than the binding. A couple of hours worth of final sanding and she'll be ready for grain filler and sealer then on to paint! Going great so far.


Wednesday, January 23, 2013
After much research and talking to several folks directly associated with Mosrite guitars, I have figured out how to do the plastic binding for the body. Today I was able to laminate 2 pieces of white binding together to make a single piece that was actually tall enough and thick enough to fit this unusual binding channel size. Tomorrow will finally start looking like progress as I will be able to shape the binding to fit and possibly even get it glued into place! The photos below are deceiving because I was originally going to do a 3 ply white/black/white binding but the black binding was too thick and made the entire thickness too much. I tried to shave it down to about half thickness, but that didn't work too well. The other choice was go just go all white, so that's what I did.


Sunday, January 20, 2013
It's been a month since I got the Mosrite body and I'm trying to get things together and all in order to really get going on this project. I have been researching the way the binding was done on these models and finally think I have a good grasp on what needs to be done in that department.
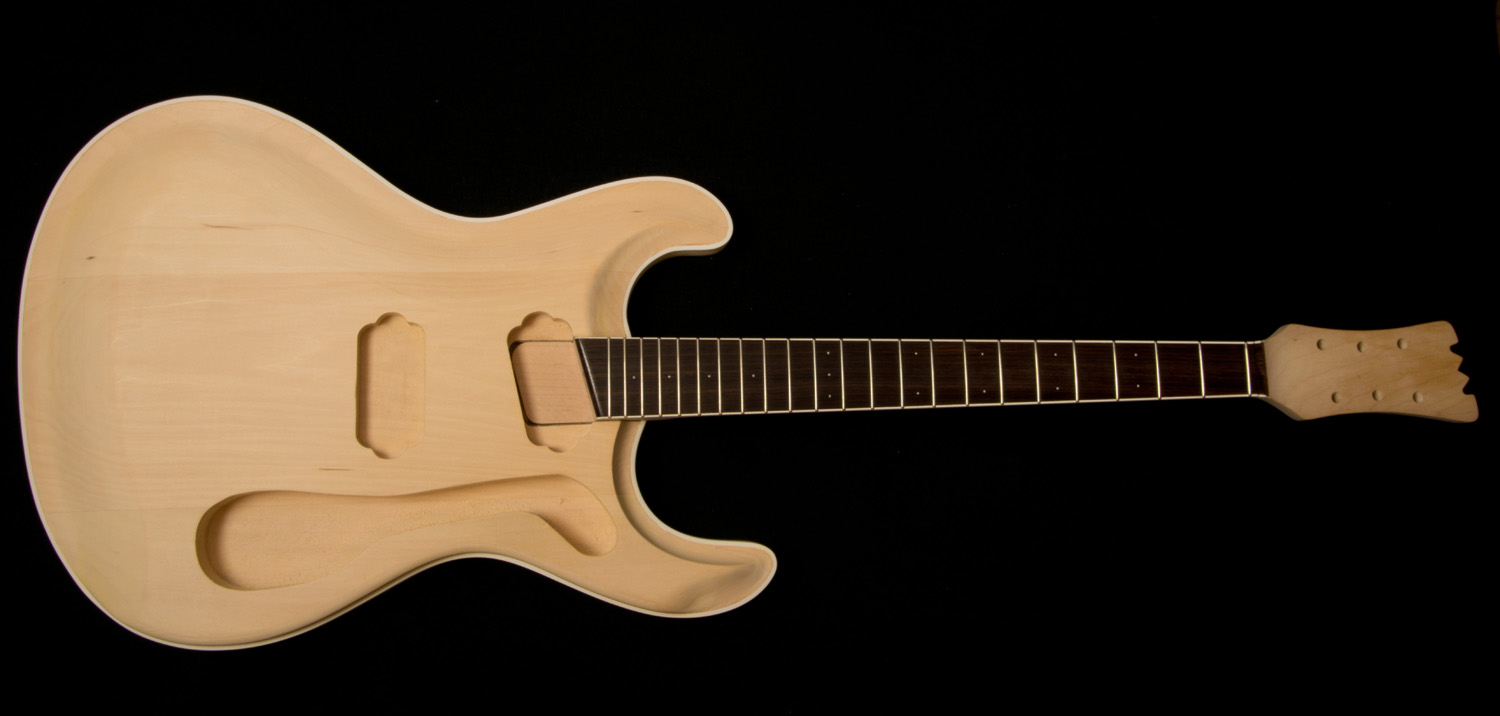
Tonight I spent about an hour with various sand paper, sanding pads and a scraper to gently sculpt and shape the tips of the "horns" in regard to the German Carve. Since this body had it's slight slip of the router, it was set aside and never sanded and prepared to finishing. If you compare with the original photos, you'll see that I smoothed the sharp edge on the horns in the carve and i carefully brought down the very tip edge to match the rest of the binding channel so that the binding will fit properly. Doesn't look like a lot done now but it's a nice, solid step to move forward.
This week I will order the binding and necessary adhesives and such to install it. Stay tuned for photos of that project. Looking forward to it!
In other news, I have found a Vibramute tremolo for it. Probably the most difficult piece of this project to find and I have one secured. That's a load off!


Subscribe to:
Posts (Atom)